
Navigating a 4-in-1 crib assembly can be challenging, often involving missing hardware or unclear instructions, as highlighted by online communities seeking assistance.
What is a 4-in-1 Crib?
A 4-in-1 crib is a versatile piece of juvenile furniture designed to grow with your child, offering multiple configurations throughout their early years. Initially assembled as a full-sized crib, it cleverly converts into a toddler bed, a daybed, and ultimately, a full-size bed. This adaptability eliminates the need to purchase separate furniture as your child develops, making it a cost-effective and space-saving solution.
The conversion process typically involves disassembling parts and reassembling them in different arrangements, often utilizing included extensions or requiring the purchase of additional components for the final full-size bed stage. Understanding each stage, as detailed in assembly manuals, is crucial for a safe and successful transformation.
Benefits of a Convertible Crib
Opting for a convertible crib presents numerous advantages for parents. Economically, it reduces long-term costs by eliminating the need for multiple furniture purchases as your child grows. Functionally, it adapts to changing needs, providing a safe and comfortable sleep space through infancy, toddlerhood, and beyond.
Furthermore, a 4-in-1 crib often streamlines the nursery aesthetic, maintaining a consistent style throughout the room’s evolution. While assembly can sometimes present challenges – as evidenced by online searches for manuals and missing hardware – the long-term benefits of convenience, cost savings, and adaptability make it a worthwhile investment;
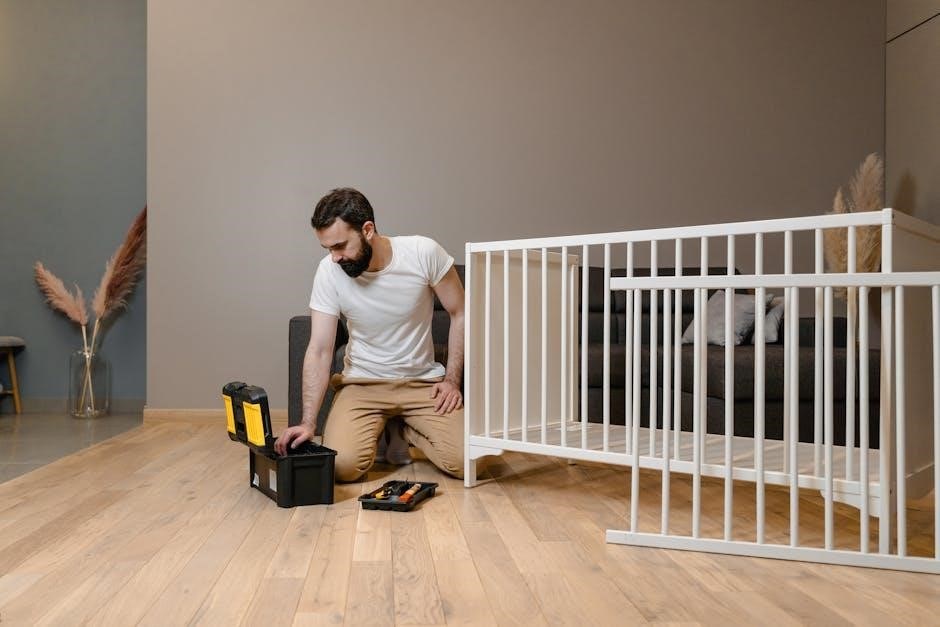
Safety Considerations Before Assembly
Prior to assembling your 4-in-1 crib, meticulous preparation is crucial for ensuring your child’s safety. Begin by carefully inspecting all components and hardware, verifying quantities against the parts list to address potential missing pieces immediately. Select a level, flat floor for construction, avoiding uneven surfaces that could compromise stability.
During assembly, strictly adhere to the provided instructions, avoiding over-tightening screws which can strip holes or weaken the structure. Regularly check all bolts and screws post-assembly to maintain a secure and stable sleep environment. Remember, a properly assembled crib is paramount for preventing accidents and ensuring peaceful sleep.

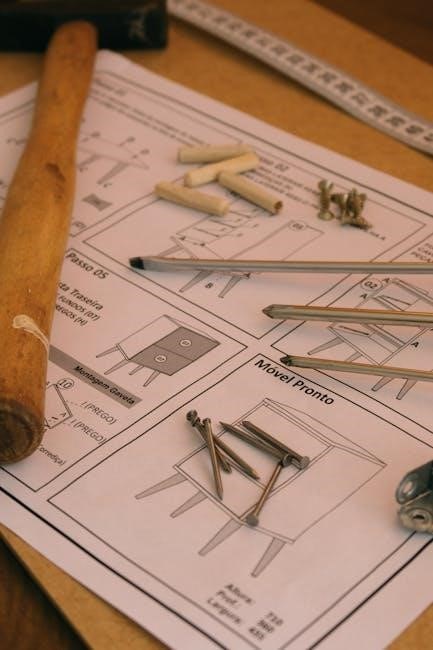
Parts List and Hardware Identification
Detailed identification of crib components (A, B, C) and hardware – including various Allen head bolts (6mm x 60mm, etc.) – is essential for assembly.
Identifying Crib Components (A, B, C, etc.)
Before beginning assembly, carefully unpack all components and compare them to the parts list. Key elements include the left and right crib sides, designated typically as ‘A’ and ‘B’ respectively. The headboard and footboard are often labeled ‘C’ and ‘D’. Stretcher pieces, crucial for structural integrity, may be identified as ‘E’.
Ensure you can differentiate between short head assemblies and other components. The mattress support, vital for safe sleep, will have its own designation. Guard rail extensions, for the toddler bed conversion, are labeled as ‘N’ (left) and ‘P’ (right). Accurate identification prevents confusion and ensures correct assembly, avoiding potential structural issues or safety hazards. Laying out all parts in an organized manner is highly recommended.
Detailed Hardware Breakdown (Bolts, Nuts, Dowels)
The hardware package contains various fasteners essential for secure assembly. Allen head bolts are prominent, with sizes including 6mm x 60mm, 6mm x 45mm, 6mm x 25mm, and 6mm x 20mm – ensuring the correct size is used for each connection is critical. Joint connector nuts (‘K’) and standard connector nuts (‘L’) are also included, differing in application.
Wooden dowels facilitate alignment and add stability to joints. Missing hardware is a common issue, prompting users to seek replacements. Careful inventory is vital. The included Allen wrench (‘M’) is the primary tool for tightening these bolts. Proper hardware identification and usage are paramount for a structurally sound and safe crib.
Allen Head Bolt Sizes (6mm x 60mm, 45mm, 25mm, 20mm)
The 4-in-1 crib utilizes four distinct Allen head bolt sizes for specific assembly stages. The 6mm x 60mm bolts are typically used for primary structural connections, offering maximum strength. Shorter 6mm x 45mm bolts secure components requiring less load-bearing capacity. Further reducing in length, the 6mm x 25mm bolts are often found in areas needing moderate fastening, while the smallest, 6mm x 20mm bolts, are used for finer details or adjustments.
Using the correct bolt size prevents stripping and ensures a secure, stable build. Refer to the assembly diagrams to confirm the appropriate bolt for each step.
Joint Connector Nut & Connector Nut Identification
Distinguishing between the Joint Connector Nut and the standard Connector Nut is crucial for proper assembly. The Joint Connector Nut, often used in areas requiring flexibility or slight movement, may feature a specialized design or coating. The standard Connector Nut provides a rigid connection for fixed parts of the crib structure.
Carefully examine the threading and shape of each nut. Incorrect nut usage can compromise the crib’s stability. Online resources and community forums frequently highlight confusion regarding these components, emphasizing the importance of accurate identification during the build process.
Tools Required for Assembly
Successful 4-in-1 crib assembly primarily requires an Allen wrench, specifically included with the crib hardware. Multiple sizes are common – 6mm x 60mm, 45mm, 25mm, and 20mm are frequently utilized. While typically sufficient, a rubber mallet can aid in gently securing wooden dowels.
Avoid using power tools, as over-tightening can strip screw holes, a common assembly issue reported by users. A flat, protected work surface is essential to prevent scratches. Having a well-lit space and organized layout of parts will streamline the process, minimizing frustration and ensuring a secure build.
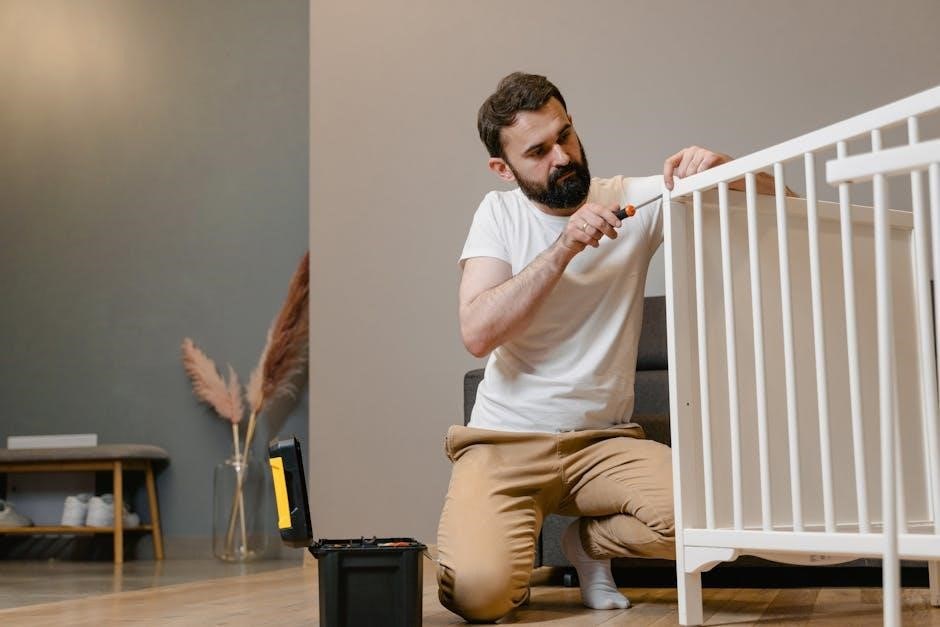
Allen Wrench Usage
The included Allen wrench is crucial for tightening all bolts during assembly. Ensure the wrench is fully inserted into the bolt head to prevent stripping. Apply firm, even pressure while turning; avoid excessive force. Different bolt sizes (6mm x 60mm, 45mm, 25mm, 20mm) require careful selection of the appropriate wrench size for a secure fit.
Rotating clockwise tightens, while counter-clockwise loosens. Regularly check bolt tightness throughout the assembly process and periodically thereafter for continued safety. If a bolt feels resistant, double-check alignment before applying more force. Avoid using alternative tools, as they may damage the hardware.

Crib Assembly ⎼ Stage 1: Crib Configuration
Begin by assembling the crib sides, headboard, and footboard, aligning wooden dowels and securing with appropriate bolts—do not overtighten initially.
Assembling the Crib Sides (Left & Right)
Carefully lay out the left and right crib side panels (identified as components A and B, potentially). Align the pre-drilled holes, ensuring proper orientation as depicted in the assembly diagrams. Insert wooden dowels into the corresponding holes to facilitate a secure connection.
Next, attach the side panels to the headboard and footboard using the specified Allen head bolts – commonly 6mm x 60mm for initial connections. Utilize the provided Allen wrench (M) to tighten the bolts, but avoid over-tightening at this stage. Ensure a flush connection between all components before fully securing. Double-check alignment to prevent instability later in the assembly process. Proper alignment is crucial for a safe and sturdy crib structure.
Attaching the Headboard and Footboard
With the crib sides partially assembled, carefully position the headboard (component R) and footboard (component, potentially D) for attachment. Align the wooden dowels from the side panels with the pre-drilled holes in the headboard and footboard. This ensures a precise and stable connection.
Secure the headboard and footboard using Allen head bolts – likely 6mm x 60mm or 45mm, depending on the specific connection point. Employ the Allen wrench (M) to tighten these bolts, again avoiding over-tightening initially. Confirm that all components are flush and aligned before fully tightening. A secure attachment of the headboard and footboard is vital for the overall structural integrity of the crib.
Securing the Mattress Support
Once the crib sides, headboard, and footboard are firmly connected, it’s time to install the mattress support. This typically involves positioning the support frame within the assembled crib structure, ensuring it rests securely on the designated ledges or brackets.
Utilize appropriate Allen head bolts (potentially 6mm x 25mm or 20mm) and connector nuts (K & L) to fasten the mattress support to the crib frame. Tighten these fasteners with the provided Allen wrench (M), checking for levelness and stability as you proceed. The mattress support must be securely attached to prevent accidental movement or collapse, ensuring a safe sleep environment for the infant.
Toddler Bed Conversion ─ Stage 2
Transitioning to the toddler bed stage requires disassembly of the crib, followed by attaching left and right guard rail extensions (N & P) for safety.
Disassembling Crib to Toddler Bed
The initial step in converting your 4-in-1 crib to a toddler bed involves carefully disassembling the existing crib structure. As per instructions found online, begin by organizing all pieces and hardware. This ensures a smooth and efficient transition. It’s crucial to follow a systematic approach, removing components in reverse order of the original assembly.
Prioritize documenting the disassembly process – photos can be incredibly helpful for reassembly if needed! Ensure all bolts (like the 6mm variants – 60mm, 45mm, 25mm, 20mm) and nuts (Joint Connector Nut & Connector Nut) are safely stored and accounted for. Remember, a methodical approach minimizes frustration and potential errors during the conversion process, setting the stage for a secure toddler bed setup.
Attaching Guard Rails (Left & Right Extensions)
Once the crib is disassembled into toddler bed configuration, attaching the guard rails – specifically the Left (N) and Right (P) Extensions – is paramount for safety. These extensions secure the toddler within the bed frame, preventing accidental falls during sleep. Align the guard rail extensions with the designated pre-drilled holes on the toddler bed frame.
Utilize the appropriate Allen Head Bolts (likely the shorter sizes, such as 20mm or 25mm, depending on the crib model) and the provided Allen Wrench (M) to firmly fasten the guard rails. Ensure a snug fit, regularly tightening the bolts to maintain stability. Double-check that the rails are securely attached before allowing a child to use the toddler bed.
Adjusting Mattress Support for Toddler Mode
Transitioning to toddler mode necessitates lowering the mattress support to accommodate your growing child and prevent climbing. Locate the adjustable mattress support brackets within the crib frame. Carefully detach the existing support and reposition it to the lowest setting, ensuring it’s securely fastened at each corner.
Re-engage the locking mechanisms on the brackets to confirm the mattress support is stable and level. A properly adjusted mattress support is crucial for safety, minimizing the risk of falls and providing a comfortable sleep environment. Verify the mattress fits snugly within the lowered frame before use.
Daybed Configuration ─ Stage 3
Converting to daybed mode involves removing the crib sides, prioritizing stability and ensuring a safe, open space for your growing toddler to rest comfortably.
Removing Crib Sides for Daybed Setup
Transitioning your 4-in-1 crib into a daybed requires carefully disassembling the crib sides. Begin by thoroughly loosening all bolts and connectors securing the left and right crib panels. It’s crucial to have a second person assist during this process to prevent accidental damage or injury. Gently detach each side panel, ensuring all dowels and connecting hardware are removed.
Lay the detached crib sides aside in a safe location, protecting them from scratches or damage. Once both sides are removed, the crib structure will transform into a daybed frame. Double-check that all hardware has been accounted for and stored securely for potential future reconfigurations. This step creates an open and inviting space for your child as they transition to a more independent sleep arrangement.
Ensuring Daybed Stability
After removing the crib sides for the daybed configuration, verifying stability is paramount for your child’s safety. Carefully inspect the remaining frame, ensuring all connections – particularly those at the headboard and footboard – are securely tightened. Re-tighten any loose bolts or nuts using the provided Allen wrench.
Gently apply pressure to each corner of the daybed frame to check for wobbling or instability. If any movement is detected, re-examine the connections and tighten further. Consider placing the daybed against a wall for added support, especially for younger children. Regular checks for stability are recommended as the daybed is used, maintaining a safe sleep environment.

Full-Size Bed Conversion ─ Stage 4
Converting to a full-size bed often utilizes existing crib components, but may require purchasing a separate headboard and footboard for completion.

Utilizing Existing Crib Components
The beauty of a 4-in-1 convertible crib lies in its adaptability, and the full-size bed conversion smartly leverages previously used parts; Typically, the crib sides themselves are repurposed as the foundation for the new bed structure. These sides often function as the rails for the full-size mattress, providing a familiar aesthetic and minimizing the need for entirely new materials.
However, it’s crucial to understand that the mattress support system from the crib stage will not be sufficient for a full-size bed. A dedicated full-size bed frame and support system are essential to ensure proper mattress support and overall bed stability. The existing components are a starting point, reducing costs, but a complete bed foundation is still necessary for safe and comfortable use.
Purchasing Additional Headboard/Footboard (If Required)
Depending on the specific 4-in-1 crib model, converting to a full-size bed may necessitate purchasing a separate headboard and footboard. Some designs allow the existing crib headboard to be integrated, but others require dedicated full-size components for aesthetic consistency and structural integrity. Carefully review your crib’s conversion instructions to determine if additional pieces are needed.
When selecting a headboard and footboard, ensure compatibility with the crib’s existing dimensions and attachment points. Matching the finish and style will create a cohesive look. Consider the overall bedroom décor and choose pieces that complement the existing furniture. Prioritize sturdy construction and secure attachment mechanisms for long-lasting safety and stability.

Troubleshooting Common Assembly Issues
Assembly often presents challenges like missing hardware, alignment difficulties, or stripped screw holes, requiring resourceful solutions and careful attention to detail for a secure build.
Missing Hardware Solutions
Encountering missing hardware is a common frustration during 4-in-1 crib assembly, as evidenced by numerous online inquiries. Identifying the specific missing component – whether it’s an Allen head bolt (6mm x 60mm, 45mm, 25mm, or 20mm), a Joint Connector Nut, or a standard Connector Nut – is the first step;
Contacting the manufacturer directly is crucial; they often readily ship replacement parts. If immediate resolution is needed, a trip to a local hardware store can provide suitable substitutes, ensuring they match the original size and threading. Carefully review the parts list and diagrams to confirm the correct hardware specifications before proceeding with the assembly. Prioritize safety by not substituting with incorrect hardware.
Difficulty Aligning Parts
Struggling to align crib components during assembly is frequently reported, often stemming from improperly seated wooden dowels or misaligned pre-drilled holes. Ensure the crib is constructed on a perfectly level and flat surface to eliminate potential imbalances. Gently apply pressure while aligning parts, avoiding forceful tightening which can strip screw holes.
Loosely assemble sections initially, then progressively tighten bolts and nuts. Double-check that components like the headboard and footboard are correctly oriented before full attachment. If alignment remains problematic, slightly loosen existing connections to allow for adjustments, then retighten securely once aligned. Patience and a methodical approach are key.
Stripped Screw Holes
Encountering stripped screw holes during 4-in-1 crib assembly is a common frustration, often resulting from over-tightening or using the incorrect Allen wrench size. Avoid excessive force; tighten bolts gradually until snug, not forcefully. If a hole is slightly stripped, try inserting a small wooden toothpick or wood glue with a sliver of wood to provide a tighter grip for the screw.
Alternatively, consider using a slightly larger diameter screw, but ensure it doesn’t compromise the structural integrity. If the damage is extensive, contact the manufacturer for replacement parts. Preventing stripping through careful assembly is crucial for crib safety and longevity.

Maintenance and Care
Regularly inspect and tighten all bolts and screws to maintain stability, and clean the wood surfaces gently to protect the crib’s finish.
Regularly Tightening Bolts and Screws
Consistent maintenance is crucial for ensuring the long-term safety and stability of your 4-in-1 convertible crib. Over time, the natural movement and use of the crib can cause bolts and screws to loosen, potentially compromising its structural integrity. It’s recommended to perform a thorough inspection of all hardware at least once a month, or more frequently if the crib is heavily used.
Utilize the provided Allen wrench (M4, as noted in some manuals) to carefully tighten each bolt and screw. Avoid over-tightening, as this could strip the screw holes or damage the wood. If you encounter any difficulty tightening a screw, double-check its alignment and ensure you are using the correct size wrench. Addressing loose hardware promptly will help prevent wobbling, squeaking, and potential hazards, ensuring a safe and secure sleep environment for your child.
Cleaning Instructions
Maintaining a clean crib environment is essential for your baby’s health and hygiene. For routine cleaning, a damp cloth with mild soap is generally sufficient. Avoid harsh chemicals, abrasive cleaners, or strong detergents, as these could damage the finish or pose a risk to your child. Always ensure the crib is completely dry before placing your baby back inside.
For stubborn stains or spills, a slightly diluted solution of baby-safe cleaning products can be used, followed by a thorough rinsing with clean water. Regularly vacuum around the crib to remove dust and allergens. Periodically inspect the wood for any signs of damage or wear, addressing them promptly to prevent further deterioration and maintain a safe and comfortable sleeping space.
Wood Care and Protection
To preserve the beauty and longevity of your 4-in-1 crib’s wood finish, regular care is crucial. Avoid placing the crib in direct sunlight or near heat sources, as this can cause fading or cracking. Dust frequently with a soft, dry cloth to prevent buildup. Periodically, apply a furniture polish specifically designed for baby cribs, following the manufacturer’s instructions carefully.
Inspect the wood for scratches or dents, addressing them promptly with appropriate touch-up products. Avoid using abrasive cleaners or waxes, as these can damage the finish. Maintaining a consistent humidity level in the room can also help prevent wood from drying out or warping, ensuring the crib remains structurally sound and aesthetically pleasing for years to come.